Starfish requires third party cookies

Starfish requires third party cookies

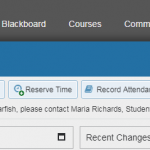
Our campus has recently started using a tool called Starfish Early Alert to track students who are having difficulties, especially those in danger of failing.   It can also be used to give kudos, and for other things, like scheduling office hours or meetings outside of office hours, or recording attendance.

Having previously taught at West Point I’m familiar with the idea.   At West Point it is called a “C.O.R.”, which stands for Cadet Observation Report.   I could report a problem with a “negative” COR  (an “NCOR”) or give kudos with a “positive COR.”   And for strictly passing on information I could mark the COR as “neutral”.    The report goes to the cadet and to the cadet’s Company Tactical Officer (TAC) and Tactical Non-Commisioned officer (TAC NCO), which is kinda like telling mom and dad, but perhaps with more consequences and less sympathy.  In most cases submitting an NCOR really gets a cadet’s attention and (usually) an improvement.

My first attempt to use Starfish at New Paltz failed because of what looked like an authentication error:

Your Starfish session has expired. To access Starfish return to your learning
management system and select the starfish link.

I had already logged in to our learning management system (Blackboard) and accessed the system via that very link, so this was not much help.    I submitted an IT ticket.

After a little investigating I found that I could connect successfully if I allowed third-party cookies (cookies that come from a site that is not the same as the one I was visiting, or attempting to visit).   I usually set my browser to block such cookies, and that’s what caused the problem.  And digging a little further revealed that the third-party cookies in question were coming from the product’s vendor, Starfish Solutions.

I generally don’t like the idea of allowing third-party cookies, out of concern for privacy, but I’m willing to make an exception on a case-by-case basis to get my work done, if I trust the sites involved.  And as it turns out, the Chrome browser allows you to do that.   So in my browser settings, under “Content Settings” and “Cookies”  I added an exception to allow cookies from the product vendor.   A little more experimentation revealed that all I had to add was:

              newpaltz.starfishsolutions.com

(It also worked when I tried a wildcard using “[*.]” at the beginning, but a more restricted exception is usually better.)  So now I allow cookies to be set from just that host and I can use their tool, and I can still block third-party cookies from other sites, preserving my privacy.

In fact, it’s not just that a cookie from the vendor is required for initial authentication, it turns out it’s required just to maintain an active session.  I demonstrated this by starting a Starfish session while allowing external cookies, as described above, then deleting that exception after I was in Starfish.   The next time I tried to do anything in Starfish it resulted  in the same confusing error message noted above.

But I got it to work, and now I can send some NCORs…

Running a task at a specified time on a Mac

Unix computers have a simple command-line feature called “at” which lets you schedule a command, or a series of commands, to be run at a specific time.    For example, if you want to download a large file in the middle of the night, when there is less congestion on the network, you can easily do so.    Since the Apple Macintosh computer is based on BSD Unix, this feature is available on a Mac, though it is turned off by default.     I’ll use downloading a file as an example in what follows, but you can use this to run almost any command at a specified time.

As you might expect, everything here is done via the command line, which means you will have to run the Terminal app.   With the Finder it is in /Applications/Utilities, while using Launchpad you will find it in a folder called either “Other” or “Utilities”.

Starting atrun

The “at” service is provided by a Unix daemon called “atrun”, which is turned off by default on a Mac.   To turn it on you have to give the command1

 sudo launchctl load -w /System/Library/LaunchDaemons/com.apple.atrun.plist

You will need to do this again if you reboot, though there is a way (see Reference 1) to turn it on permanently.

Simple Example

Let’s test the system first. The command is simply “at” followed by a time or date (or both). So if it’s currently 10:00 AM, then the commmand  “at 1002”  will run the command(s) in 2 minutes.   Once you give this command the terminal will wait for your input.  Enter as many Unix commands as you like, one per line.  I’ll just demonstrate with the “echo” command.  When you are done, press Control-D (the Unix end of data character, often written in examples as “^D”).  When you do so, you’ll get a line telling you the job number and date and time it will run. Here’s an example (the parts in red are what I typed):

thrain:myers> date
Thu Aug 16 10:00:45 EDT 2018
thrain:myers> at 1002
echo "Hello, World!"
^D
job 8 at Thu Aug 16 10:02:00 2018

The command “atq” will show you the contents of the queue of commands waiting to be run.

thrain:myers> atq
8       Thu Aug 16 10:02:00 2018

The job is queued to run at 10:02. When I check on it at 10:03 I find:

thrain:myers> date
Thu Aug 16 10:03:48 EDT 2018
thrain:myers> atq
thrain:myers>

The lack of output means there is nothing in the queue. Where did it go? The output is sent to you using the Unix mail system. It won’t go to your gmail account, but you can easily get it using the local Unix “mail” command:

thrain:myers> mail
Mail version 8.1 6/6/93.  Type ? for help.
"/var/mail/myers": 1 message 1 new
>N  1 myers@thrain.local    Thu Aug 16 10:02  13/452   "Output from your job "
? 1
Message 1:
From myers@thrain.local  Thu Aug 16 10:02:07 2018
X-Original-To: myers
Delivered-To: myers@thrain.local
Subject: Output from your job a00008018639aa
Date: Thu, 16 Aug 2018 10:02:05 -0400 (EDT)
From: myers@thrain.local (Atrun Service)

Hello, World!

? q
Saved 1 message in mbox

Downloading a large file at a specified time

So how can we download a file? Another Unix utility, the “curl” command,2 will automatically transfer a file from a specified URL. I’m going to use it to download a 475MB file containing data from LIGO’s first detection of colliding black holes,3 which will come from https://losc.ligo.org/archive/data/O1_16KHZ/1126170624/L-L1_LOSC_16_V1-1126256640-4096.hdf5.

By default, curl will output whatever it downloads to “standard output,” which means it will spew out into the terminal window. To avoid that, and cause curl to save the data to a file of the same name, I will add the “-O” flag (that is a capital letter Oh). And as it turns out, that URL is not the real URL for the file, it leads to a redirect, so I will also include the “-L” flag to tell curl to follow the redirect. Finally, curl can be very verbose while it operates, to display download status. But for our purpose we just want it to work silently, so I’ll add the “-s” flag.

Also, I want to time how long this takes, so I’ll prefix the curl command with the Unix “time” command.

And I want to put this on my desktop. When you first open the Terminal app your default directory (“current working directory”) is your home directory, and your desktop is a subdirectory (folder) called “Desktop”. So I’ll use the Unix “cd” (“change directory”) command to go down into that subfolder first.

Here’s how I do all this:

thrain:myers> date
Thu Aug 16 11:14:51 EDT 2018
thrain:myers> at 1117
cd Desktop
time curl -O -L -s https://losc.ligo.org/archive/data/O1_16KHZ/1126170624/L-L1_LOSC_16_V1-1126256640-4096.hdf5
^D
job 15 at Thu Aug 16 11:17:00 2018

After a short wait I find the queue is empty, and the file is on my Desktop. But since it is a large file it actually takes several minutes for it to finish downloading, and only after that does the output show up in the Unix mail queue:

thrain:myers> mail
Mail version 8.1 6/6/93.  Type ? for help.
"/var/mail/myers": 1 message 1 new
>N  1 myers@thrain.local    Thu Aug 16 11:23  16/482   "Output from your job "
? 1
Message 1:
From myers@thrain.local  Thu Aug 16 11:23:07 2018
X-Original-To: myers
Delivered-To: myers@thrain.local
Subject: Output from your job a0000f018639f5
Date: Thu, 16 Aug 2018 11:23:07 -0400 (EDT)
From: myers@thrain.local (Atrun Service)


real    5m56.723s
user    0m24.240s
sys     0m7.400s

? q
Saved 1 message in mbox

As you can see, it took almost 6 minutes to download the file.

Learning more

You can learn more about any of these Unix commands by reading the Unix Manual pages, using the Unix “man” command. For example, saying “man curl” will tell you more about the curl command, and saying man time will tell you more about the Unix “time” command. Saying “man at” can help you understand how to use the relative time features of the at command, such as

  at now + 12 hours

References and Notes

  1. “Mac OS X: at command not working” on StackExchange site “superuser.com”, https://superuser.com/questions/43678/mac-os-x-at-command-not-working
  2. On some versions of Unix you can use the wget command, but this is not available on the Mac
  3. Data release for event GW150914, from the LIGO Open Science Center, https://losc.ligo.org/events/GW150914/

Raspberry Pi WiFi Access Point

Raspberry Pi WiFi Access Point

I have an old iPad which has been dropped so many times that a piece of wire fell out the side, and I think that wire was the WiFi antenna. The iPad can only connect to WiFi when it’s close to the access point or when the signal is very strong. I figured out that my young daughter could still use it in the kitchen, far from the router, if I put a WiFi repeater in the kitchen. As it turns out, this also extends WiFi to the back patio, which is an added bonus.

I originally used an old Raspberry Pi 1B for this, and that’s still what I’ve mainly been using. It’s a good use for old hardware. It runs headless, with 2 USB wifi dongles, and sits under a cupboard just like lots of other modern appliances.  But I’ve also tried this out with models 2B and 3B. The model 3B has an internal wifi interface, so you only need to add one extra USB dongle. The original wifi dongles did not have antennas, and that limited their range, so I’ve recently upgraded to the ones with antennas, as shown in the picture above.

This page was started in the summer of 2018, when I used Raspbian Stretch on a Raspberry Pi 1B, but the most recent revision was in December 2020 and I’ve made some improvements.1 I originally used instructions from user Dryfire117 on pastebin2.   I later found useful instructions on the Raspberry Pi website.3  After going through the process several times and experimenting with variations I have been able to simplify things in several ways. For one thing, you can use either WiFi or wired ethernet for the upstream connection.

I’ve broken this up into several separate pages, because some of these steps are useful for related projects that I’ll be reporting on later, and because I think it’s just easier to follow and understand when it’s broken into separate parts like this. Here are the key steps:

  1. Setup a new SD card

    After flashing a new image on an SD card, boot it up and perform the “usual” set of configuration steps, as describe in “Raspberry Pi Initial Configuration” or your other favorite source.

  2. Configure Network

    We need to configure two networks, the “local” network managed by hostapd to be a WiFi Access Point (AP), and the “upstream” network connection to the internet. The upstream connection can either be wired or also via WiFi.  The steps required to set this up have grown to the point that they have been put into a separate page, “Network Configuration for a WiFi Access Point.”

  3. Install and configure hostapd

    When I originally started doing this, you had to build hostapd from source code to get the nl20211 driver, but newer versions of Raspbian now include that driver by default, making things a bit easier. There are still a number of steps required to configure hostapd.  Follow the instructions in the article “Configuring hostapd on Raspberry Pi.”

  4. Set up DHCP server

    The DHCP daemon is what assigns IP addresses to the computers that join your private network. Follow the instructions in the article “DHCP Daemon on Raspberry Pi.”

  5. Configure NAT routing

    Everything so far sets up an access point. Now we also need to configure the routing tables to perform Network Address Translation (NAT) and add a default route. Follow the instructions in the article “Raspberry Pi Access Point Routing Tables.

  6. Add DNS servers (optional)

    The file /etc/resolv.conf contains the names of Domain Name Service (DNS) servers, but on Raspberry Pi this file gets overwritten at each reboot. It will probably contain the IP address of your upstream router, but nothing more. It is useful to have more nameservers for redundancy, in case one of them has a problem. Also, I now have a piHole DNS server on my local network, and I’d like to have anything on my internal network use that. The simplest way to do this is to edit the file /etc/resolvconf.conf and add a line like this:

    name_servers=192.168.1.29 1.1.1.1 8.8.8.8

    Take a look at /etc/resolv.conf after a reboot to confirm that these made it into the list.

  7. Add Monitoring (Optional)

    Since this device will run headless it can be useful to have a status display provided by a web page. This is easily done by adding a web server, either Apache or NGINX, which is described well on the Raspberry Pi website.4 In either case the main web page for the server lives in the directory /var/www/html/. You could make a simple HTML web page in the file index.html, or something more dynamic as a PHP script called index.php (such as this).

  8. Save Everything

    It’s useful to have a list of all the files you’ve modified to make this all work, so that you can go back and make checks or changes, so that you can make backup copies, and so that you can easily deploy the same files to another machine. I put the list into a file called wifipi_files.txt:

    /etc/network/interfaces 
    /etc/network/interfaces.d/
    /etc/default/hostapd
    /etc/hostapd/hostapd.conf
    /etc/default/isc-dhcp-server
    /etc/dhcp/dhcpd.conf
    /etc/resolvconf.conf
    /var/www/html/index.php

    It is then simple to make a tar archive (tarball) containing just these files, using the command
    tar -czP --files-from=wifipi_files.txt -f wifipi.tgz
    The -P flag preserves the full file path when the file is saved in the tarball. To deploy these files on another machine simply copy the tarball to the other machine and (as root or using sudo) give the command
    tar xzf wifipi.tgz
    to extract them into place.

References and Notes

  1. The original title of this page called this a WiFi “repeater”, which is somewhat ambiguous. The instructions here turn the Pi into an “Access Point” which has its own local network. It’s also possible to turn a Pi into a “bridge,” which just extends an existing network. I may try that out (and document it) in the future.
  2. How to: Make a Raspberry Pi Powered Wifi Repeater” by Dryfire117,  https://pastebin.com/A4jUp2Nq
  3. Setting up a Raspberry Pi as a routed wireless access point,” https://www.raspberrypi.org/documentation/configuration/wireless/access-point-routed.md
  4. Setting up a web server on a Raspberry Pi https://www.raspberrypi.org/documentation/remote-access/web-server/

This Building Sucks (Literally)!

This Building Sucks  (Literally)!

Today the doors to the new Science Hall at SUNY New Paltz are really hard to open.   There is a howling sound as wind screams its way through the cracks between the doors, which goes away temporarily as you open the door (if you can!) and returns immediately when the doors close.

The problem is that the air pressure in the building is much lower than the air pressure outside.   The doors open outward, so the extra force of the atmospheric pressure pushes against the doors to hold them closed.   This building literally sucks!

This is causing another interesting phenomenon.    In one place where air is shooting through a crack under a door it is causing ripples in the floor mats, as shown in this video taken by someone else in our building.


Since this is the PHYSICS building I decided to make some measurements.   I used a Vernier Gas Pressure Sensor (Model GPS-BTA) connected to a Vernier LabQuest .  (I wanted to use the newer LabQuest 2, but the one we have had  a bulge in the backside which turned out to be a swelling Lithium Ion battery.  Danger!)   Repeated measurements inside and outside yield a pressure difference of about  0.03 psi.

That may not seem like much, compared to an atmospheric pressure which is, on average, about 14.7 psi, but from this small difference you can compute the extra force pushing on the door.   The exterior doors are about 3 feet wide and 10 feet tall, giving a surface area of 30 ft².   There are 12×12=144 square inches in every square foot.   Thus

30 ft² × 144 in²/ft² × 0.03 lbs/in² = 130 lbs

That means the exterior doors have over 100 pounds of extra force holding them closed.   No wonder they are so difficult to open.

As I was writing this I grabbed the pressure sensor to verify the model number, and I noticed the pressure here inside the building was closer to that outside. And sure enough, after reporting the problem to our Facilities Office the HVAC was just shut down, and I could  even see the pressure rising slowly to match the outside air pressure.

So our building no longer sucks.

(Actually, it’s quite nice, but there are still a few kinks getting worked out.)


Cosmic Watch: Initial Cost Estimate

Cosmic Watch: Initial Cost Estimate

CosmicWatch is a small, inexpensive, home-built (or lab-built) cosmic ray detector designed by the Laboratory for Nuclear Science at MIT.     I’ve set out to build one, and this is Episode 2 of the adventure.

The claim is that “single detector costs approximately 100 USD”,1 though I learned later that this estimate does not include the scintillator, because “we found that physics departments often have left over scintillator from previous experiments”.    Well, our physics department does have some small pieces of scintillator, but they are not necessarily left over, and in any case I want to know the full cost of building the device from scratch.    Although the designers of CosmicWatch are targeting college physics departments, I’m interested in seeing if it is affordable and practical for high schools too, in comparison to Fermilab’s QuarkNet project.2

I’ve been skeptical of the price claim, even though it’s clear that the device will be much less expensive than other student detector projects.    And as you will see below, my skepticism is well founded.   It does cost more than $100 to build the thing.   But I have to say, this looks like a well organized project, because they even provide an Excel spreadsheet listing all the parts needed, including vendors and part numbers.   Nice!

So I sat down for an hour or so visiting those vendor sites and recording prices (in an expanded Excel spreadsheet, which I’ll publish when it’s in final form).     The result is, first, to clearly disprove the $100 price point.    The key element of the detector is a Silicon Photomultiplier (SPM) chip, which replaces the traditional (and very expensive) Photomultipier Tube (PMT).    The cost of the SPM chip alone was $119.  So the $100 budget is totally blown by that single key component.

The component I thought would be the most expensive and/or the most difficult to obtain was the scintillator.   This is basically a piece of clear plastic, with some additional elements added which produce light (“scintillate”) when a cosmic ray passes through.    The good news is that one can purchase a piece of scintillating plastic of exactly the size called for on eBay for only $30.3   So no worries there.

Another happy discovery is how easy it is to price and collect electronic components on DigiKey.com.

Although some parts can be purchased individually, it quickly  became clear that other parts would have to be purchased in groups or lots.   For example, the OLED display (the status panel on the device) come in a package of two for $17.   To build one device I still have to pay $17.    Similarly, the power jacks come in lots of 50, for $7.19, even though I only need one of them.   Even if I have some of the parts on-hand, I wanted to determine the cost for someone (eg. a high school) to build the device from scratch.   So the cost to build just one of these is $7.19 for that part.

But there’s another way to look at it.  If we decide to build more of them, we’ll have many of the parts already available.   That will cut the cost for those parts.

In the end, I decided to compute to kinds of costs.   What would it cost to build just one device, from scratch?    That ended up being $236.98.    That’s a lot more than $100, but it’s also a lot less than $2000.

The other cost is per-unit is we build many of them and look at just the cost for parts for one.   That power jack is only $7.19/50 = $0.14, or 14 cents per device.   That brings the overall cost per unit down to $185.33.    Again, more than $100, but now less than $200.

One final thing to remember is that this is just an estimate.   It neglects the aluminum case and faceplates (I plan to have the device open to view).   It also neglects an actual power supply  (it wasn’t on the list).    And perhaps most important of all, these prices do not include shipping for the parts, which will have to be included in an overall cost analysis (when all is said and done).

References

  1. Cosmic Watch – detector,  https://web.archive.org/web/20171222123454/http://cosmicwatch.lns.mit.edu/detector#section0, and this was the newest version of this page as of 28 June 2018.
  2. Cosmic Ray e-Lab,  https://www.i2u2.org/elab/cosmic/home/project.jsp
  3. link directly to it

Summer Solstice in Wooster Hall

Summer Solstice in Wooster Hall

Wooster Hall at SUNY New Paltz has a neat feature.   The main staircase is exactly aligned along a north-south line, and skylight windows in the ceiling were placed so that light from those windows lines up at the bottom of the staircase at solar noon on the equinoxes.    In the summer the sun is higher, and so the light from the skylights lines up with the top stairs of the staircase.     It’s become an event on campus to come watch the lights slowly crawl over until they line up with the staircase.

The first time I watched this, last spring, I was inspired to create a time-lapse video; but without preparing ahead of time I ended up standing up against a wall for an hour, taking pictures every minute, and then later writing a Python script to assemble the frames into an animated GIF. The results can be found here, and the technical details are here.

For the subsequent Summer Solstice I was ready with both an iPhone set to time-lapse mode and a Raspberry Pi programmed to take pictures every 5 seconds. The result from the Raspberry Pi is now on YouTube (watch the stripes of sunlight on the top stairs, not the people):

Technical details of how the Raspberry Pi was configured may be shared later. Instead of trying to assemble the time-lapse video on the Raspberry Pi itself, this video was assembled using iMovie on an iMac.   (I tried to use software called TLDF, but it requires frame sizes of at least 800 pixels, and the frames captured for this video were 640×480.) The result was an mp4 video file instead of an animated GIF. Perhaps I’ll get to try TLDF at the fall equinox….

Raspberry Pi Access Point Routing

Raspberry Pi Access Point Routing

This is the last step required to turn a Raspberry Pi into a WiFi Access Point. If you want to see all the previous steps, start with “Raspberry Pi Wifi Access Point“.   When you get to this page you should already have done the following:

  1. Configured both network interfaces,
  2. Set up hostapd (a daemon which lets a host become an Access Point), and
  3. Installed and configured a DHCP server.

I originally followed more complicated instruction from user Dryfire117 at pastebin.com, 1 and then later became aware of a simpler way to do the same thing which is documented on the Raspberry Pi website.2 I think the way presented below is just as simple as the latter.

  1. First, we need to enable IP forwarding by the Linux kernel, by editing the file /etc/sysctl.conf and uncommenting the line:
    net.ipv4.ip_forward=1
    

    You will  need to be root or use sudo to edit this file.  An alternative is to put this single line in the file/etc/sysctl.d/routed-ap.conf.   Either way, this will take effect at the next reboot.

  2. Next we will use iptables to add a routing rule to do Network Address Translation (NAT), and then add a default route. This is simply done by editing the configuration file for the upstream interface in the directory /etc/network/interfaces.d/ – either eth0 for a wired upstream interface, or wlan1 for a wireless upstream interface. Either way, add the following two lines to the file as part of the configuration for that interface:
    post-up  iptables -t nat -A POSTROUTING -o eth0 -j MASQUERADE
    post-up  route add default gw 192.168.1.1  eth0

    As you might suspect, commands given after the “post-up” keyword are performed after the interface has successfully been brought up.  The IP address after “gw” is the gateway address for the upstream network.

  3. Reboot and verify that it’s all working, or to debug it if it isn’t.

I have tested using both upstream interfaces at the same time, but you really can’t. When both eth0 and wlan1 are brought up it seems that they compete and the IP masquerading setting for only one of them takes effect. That’s actually good, because if you delay one to let the other finish, so that you have IP masquerading set up for both interfaces, then it just doesn’t work (at least not if they are both on the same upstream network).

References

  1. How to: Make a Raspberry Pi Powered Wifi Repeater by Dryfire117, https://pastebin.com/A4jUp2Nq
  2. Setting up a Raspberry Pi as a routed wireless access point, https://www.raspberrypi.org/documentation/configuration/wireless/access-point-routed.md

DHCP daemon on Raspberry Pi

DHCP daemon on Raspberry Pi

DHCP stands for “Dynamic Host Configuration Protocol”.    The DHCP daemon is the process which assigns IP addresses to computers when they join a network, and gives them other important information about the network, including DNS server addresses. A local network used for a wireless Access Point usually has a DHCP server associated with it. It’s important to note that this is a DHCP server for the local network, but the AP may also act as a DHCP client to get it’s own network configuration information from the upstream link. These are two different things.

There are several packages that you can use to run a DHCP server. I chose the ISC DHCP server package (isc-dhcp-server), but I later learned that one can also use the dnsmasq package as a DHCP server.1 Choose one or the other.

Here is how I set up and configured dhcpd on Raspbian Stretch, using the isc-dhcp-server. This page was originally written in 2018, but I recently updated it in December 2020.

  1. Install: Install the package:
    sudo apt-get install isc-dhcp-server
    When you install this package it is configured to run automatically at boot time (
  2. Configure: There are two files to edit or check:
    1. Move the existing file /etc/dhcp/dhcpd.conf out of the way so you can replace it with your own:
      sudo mv /etc/dhcp/dhcpd.conf /etc/dhcp/dhcpd.conf.ORIG
      (You should keep it because it contains good documentation and examples).
      Then create and edit a new file /etc/dhcp/dhcpd.conf containing:2

      #                                                                               
      # Configuration file for DHCP server on Rasberry Pi                             
      #                                                                               
      ddns-update-style none;
      option domain-name "wifipi.local";
      option domain-name-servers 8.8.8.8, 1.1.1.1, 192.168.1.1;
      default-lease-time 3600;
      max-lease-time 86400;
      authoritative;
      log-facility local7;
      
      # Configure service for local network 192.168.47.0 (the wireless AP)                    
      subnet 192.168.47.0  netmask 255.255.255.0 {
          range 192.168.47.50  192.168.47.250;
          option routers 192.168.47.1;
      }
      ##
    2. Also edit the file /etc/default/isc-dhcp-server to add the line:
      INTERFACESv4="wlan0"

      Change the name of the interface to the local network if you are using something else.

  3. Add a Delay: While I could start the service “by hand” once the Pi had booted, I found that the ISC DHCP server would sometimes not start at boot time, even though it is configured at installation to do so. When that happened I found a complaint in the log file (viewed with `grep dhcp /var/log/syslog`) like this:
    dhcpd[345]: Not configured to listen on any interfaces!

    The problem appears to be that the server is brought up at the same time the interface is being configured, and sometimes the interface is not ready yet. A simple solution3 is to add a slight delay to the init script that brings up the DHCP server. I edited the file /etc/init.d/isc-dhcp-server and found the line (in the start_daemon() function) which actually starts the daemon. I then added a sleep of a few seconds (at least 4 seemed to be needed) right before it. The code should look something like

            sleep 4
            start-stop-daemon --start --quiet --pidfile $PIDFILE \
                    --exec /usr/sbin/dhcpd -- $VERSION -q -cf $CONF $INTERFACES
            sleep 2

    As you can see, there is already a sleep of 2 seconds right afterwards to let the daemon get started.

    A more elegant solution would be to create a systemd service file for this daemon. If that’s not been done in a newer release of the Raspberry Pi OS (I will check at some point) then I may do that and report the result. Another solution, of course, is to use dnsmasq instead.

Notes and References

  1. See Setting up a Raspberry Pi as a routed wireless access point at https://www.raspberrypi.org/documentation/configuration/wireless/access-point-routed.md
  2. “How to: Make a Raspberry Pi Powered Wifi Repeater” by Dryfire117, https://pastebin.com/A4jUp2Nq
  3. Found on StackExchange, of course: https://askubuntu.com/questions/58032/dhcp-server-doesnt-start-at-boot-because-of-wrong-startup-order

The Compartment Box Trick

Figure 1: Plastic compartment box.
Figure 1: Compartment Box

Have you ever taken something apart and then put it back together and had parts left over? Me too. Sometimes it’s something I know isn’t needed, but it’s still better to get everything back in the right place.  A few years ago I discovered a little trick that helps me do that.

What I do is I start with an empty plastic compartment box (see Figure 1),  and as I take the thing apart I put the various screws and small parts into successive compartments.  When I’m done with disassembly I have a complete set of parts, organized in the order they came out of the thing (see Figure 2).   And then when it’s time to re-assemble the thing, I can just go backwards through the compartments and I have everything that I need in the order that I need it, and I don’t forget anything.

Figure 2: Compartment box in use


You don’t have to have a special plastic box for this, because an egg carton works just as well.   (That’s what I started with, but I got the plastic compartment boxes when they were on sale at the store.)   However, one great advantage of the compartment box is that you can close it when you are done, or when you have to take a break from the work, and you are in less danger of losing everything all over the place if someone bumps into it or bumps into the bench.


Just don’t let anybody fill up the box with parts. You need to have an EMPTY plastic compartment box available when you start taking the thing apart.   Think of it as another one of the tools you’ll use to fix whatever it is you are fixing, rather than as storage.

Configuring hostapd on Raspberry Pi

Configuring hostapd on Raspberry Pi

The daemon hostapd is a Linux service which enables  a “host” computer to become a WiFi Access Point (AP).     Thus  “host” + “AP” + “d”  (for daemon) gives the name hostapd.

I originally learned to set up hostapd from  instructions on Pastebin written by user Dryfire117,1 andlater found useful instructions on the Raspberry Pi website.2 The process originally involved building the daemon from source code to get support for the nl80211 driver, but that is now included with the prepackaged version you can install using apt-get. Here are the main steps:

  1.  Install:  Install hostapd with the following command
    $ sudo apt-get install hostapd
  2. Configure: Create and edit the configuration file, at /etc/hostapd/hostapd.conf.
    For starters, include the following:

    interface=wlan1
    #If this fails, try rt1871xdrv a 
    driver=nl80211
    # Name of the new network: best use the hostname
    ssid=wifipi
    
    # Pick a channel not already in use
    channel=6
    # Change to b for older devices?
    hw_mode=g
    macaddr_acl=0
    auth_algs=3
    # Disable this to insure the AP is visible:
    ignore_broadcast_ssid=0

    This creates an open, unsecured access point. Anybody can connect to it without having to give a password. In some cases that is what you want, but in other cases you will want
    to turn on WPA for security and add a password.  In that case, add the following to the hostapd.conf file:

    wpa=2
    wpa_passphrase="RaspberryWiFi"
    wpa_key_mgmt=WPA-PSK
    wpa_pairwise=TKIP
    rsn_pairwise=CCMP
    

    You should, of course, pick a better password. It has to be at least 8 characters long.

    There are many, many other options which can be set in this configuration file, but these are the ones needed in most cases to get up and running. Full documentation of the options can be found in a sample configuration file at https://w1.fi/cgit/hostap/plain/hostapd/hostapd.conf

    A few things I’ve learned from testing options on the Raspberry pi are that trying to enable the Automated Channel Selection (ACS) algorithm  via “channel=0” does not work, and setting “hw_mode=any” does not work. At least they didn’t work for me when I tried them, but maybe they have been fixed since then.

  3. Test:  Test it manually to make sure the configuration file is okay:
    $  sudo /usr/sbin/hostapd /etc/hostapd/hostapd.conf

    If there are errors it will complain and abort.  Unfortunately some older wifi devices don’t support all the features necessary to run an access point.   This is where you find out if yours will work.If there are no problems it will run and you can see the network SSID on a nearby device. Simply press ^C to stop it.

  4. Enable: Have The latest version of hostapd uses systemd startup rather than initd.  It also starts out “masked” so you need to first unmask the service.  The commands are (as root):
    #  systemctl unmask hostapd
    #  systemctl enable hostapd
    

    You can test manually that the service will start this way with

    #  systemctl start hostapd
    

    You can, if you wish, change the location of the configuration file by editing the file /etc/defaults/hostapd and setting the variable DAEMON_CONF to the full path to the alternate configuration file.

Once hostapd is enabled and running, the next step is to enable the DHCP service, so that clients joining the network are automatically assigned IP addresses.

References

  1. How to: Make a Raspberry Pi Powered Wifi Repeater” by Dryfire117,  https://pastebin.com/A4jUp2Nq
  2. Setting up a Raspberry Pi as a routed wireless access point,” https://www.raspberrypi.org/documentation/configuration/wireless/access-point-routed.md
Skip to toolbar