Instructions for modifying a Logitech C270 so that one can adjust the focus manually.
The Logitech C270 is an inexpensive all-purpose webcam with a fixed focus which is set at the factory to be used for face-to-face video meetings with the camera placed on top of your computer monitor or above a laptop screen. The lens inside the device can be focused for different distances, if you are willing to open up the case and remove a glob of glue. It is even possible to modify the case to create a small opening to allow you to change the focus manually using a paper clip.
One result of this modification is that the C270 becomes a better choice to use for a document camera. The more expensive Logitech C910 and C920 have an auto-focus feature which does too much back-and-forth focusing when used as a document camera, and it also has a wider field of view. The narrower field of view of the C270 is better for looking just at a document, and once the focal distance is adjusted it will stay where it needs to be and won’t cause distractions.
Part A below shows you how to open the case and remove the glob of glue that keeps the lens focus fixed. Part B shows you how to create a small opening just large enough to be able to adjust the focus with a paper clip even with the face plate in place.
All of the images in this article, both above and below, were taken with a C270 modified as described (although for some images I also did some minor cropping to highlight the most interesting parts).
A. Releasing the Focus
The lens is held at fixed focus by a glob of hot glue which is put on in the factory. The goal of the following steps is to remove that glob of glue, so that you can turn the focus wheel (the “gear wheel” around the lens) to change the focusing distance.
- Assemble the tools:
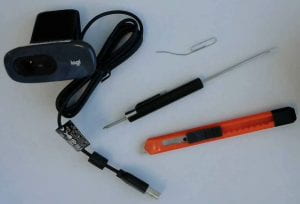
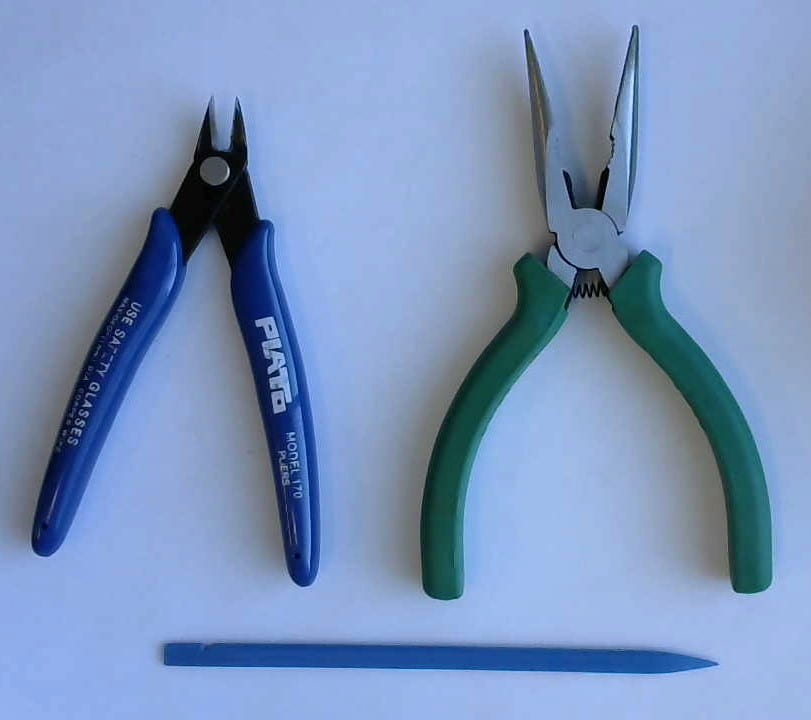
Figure 1: tools necessary to perform the modifications. The main tools you need for this modification are a flat headed screwdriver to pry the front frame off, a phillips head screwdriver (No. 01) to remove some screws, and a knife to cut away the glob of glue. (It’s possible you might accomplish that with the flat head screwdriver.)

Figure 2. Optional tools that might make the job easier. Some additional tools might make the job easier. A plastic spludger or something similar would be better for prying off the front frame without leaving marks. A pair of cutters could help with cutting away the slot (in Part B below) and pliers can help you remove the material from the slot.
- Remove the Frame:

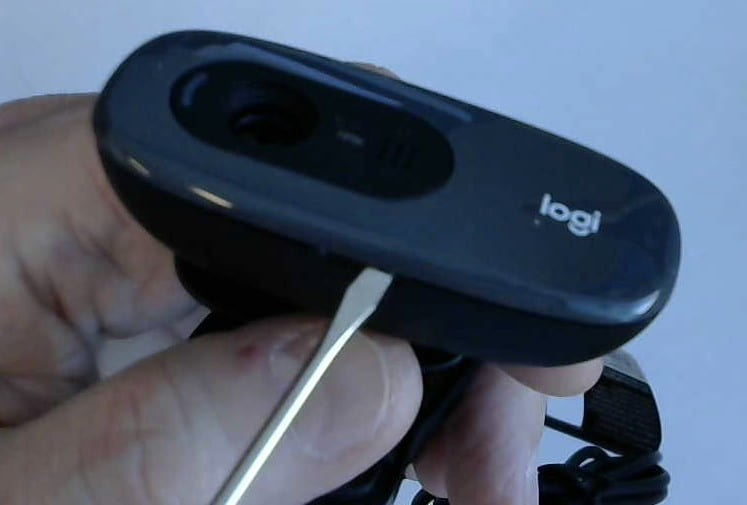
Figure 3: Remove the “frame” on the front of the camera. Remove the frame on the front of the camera by prying, starting at the slot on the bottom for that purpose, using a flat head screwdriver or a spludger or similar tool.
- Remove face plate screws:
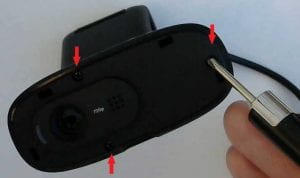
Figure 4: Remove the face plate (front of camera housing) by unscrewing the three screws. Remove the three screws shown in Figure 4 and then remove the face plate.
- Microphone Sleeve:
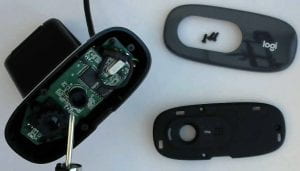
Figure 5: Remove and save the rubber sleeve around the microphone. There is a round rubber sleeve around the microphone. Remove it and save it for reassembly. Don’t forget it – this is the easiest thing to overlook during reassembly.
- Circuit board:

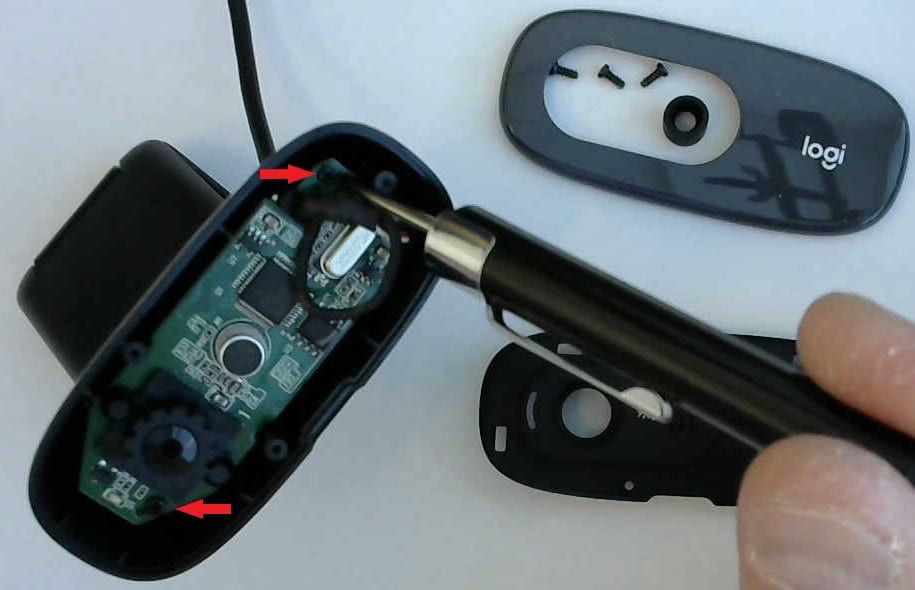
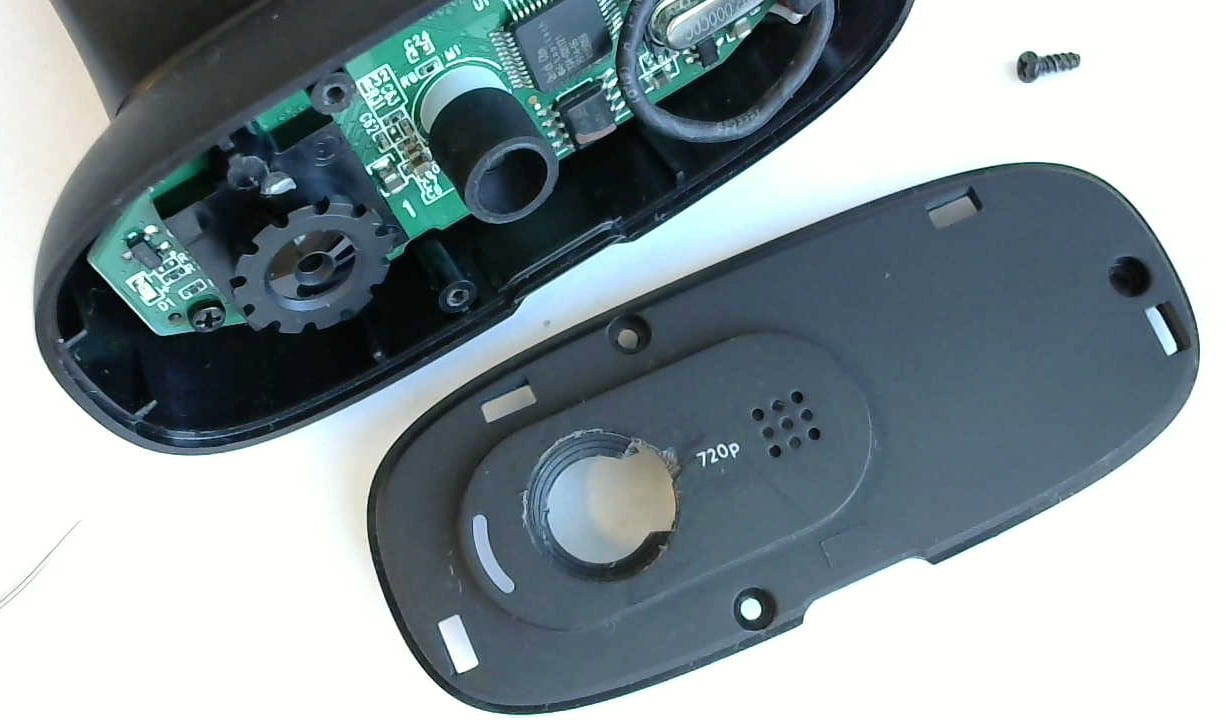
Figure 6: Remove the two screws (arrows) holding the circuit board to the case. Remove the two screws (shown in Figure 6) which attach the circuit board to the case. You need to do this to lift the circuit board out a bit to gain access to the side of the lens, under the gear wheel.
- Remove Glue Glob:
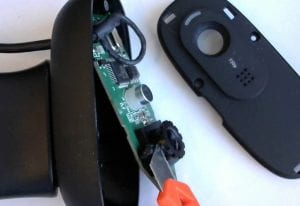
Figure 7. Lift out the circuit board and find and remove the glob of glue. Locate the glob of glue that prevents the lens from turning to focus. It is likely on the side that is toward the top of the camera case. Using the knife or other tool, remove the glob of glue so that you can turn the lens with the gear wheel. Turning the lens lets you adjust the focus. You might find it helpful to turn the lens back and forth several times to make sure it is free to turn, and you might want to make sure that all the glue has been removed so that nothing catches or is impeded.
- Anchor Circuit Board: seat the circuit board back where it was and attach it to the case with the two screws shown in Figure 6. At this point re-assembly is the reverse of the steps above, but don’t forget the microphone sleeve.


After you have released the lens so that it can be turned to focus you have several choices: One is to adjust the focal distance to fit your needs and then reassemble the device, by going back through the steps above in reverse order. This is appropriate for an application where the camera will always be the same distance from the object, such as when used as a document camera.
Another option is to just leave the face plate off and expose the lens so that the focus can be adjusted anytime that is needed. This is the best choice if you will be using the camera for a variety of shots where the distance to the object can vary a lot. And besides, the bare circuit board looks cool and “technical”, and the activity LED may even give you some extra light for close-up shots.
In between these two, you can open a small slot in the face plate next to the lens, just big enough to let you adjust the focus using a paper clip. Then the camera looks almost like a stock C270, but the focus can be adjusted when needed.
B. Opening a Slot
Here is how to make a small slot so that you can adjust the focus with a paper clip even after the face plate and frame have been reinstalled. If you choose this route, it is a good idea to turn the lens back and forth multiple times to make sure that it is free to turn, because it is difficult to adjust the focus with a paper clip if the lens is binding as it is turned.
- Score Lens Opening:
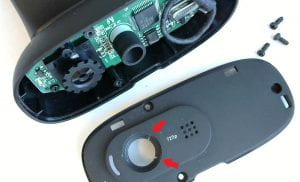
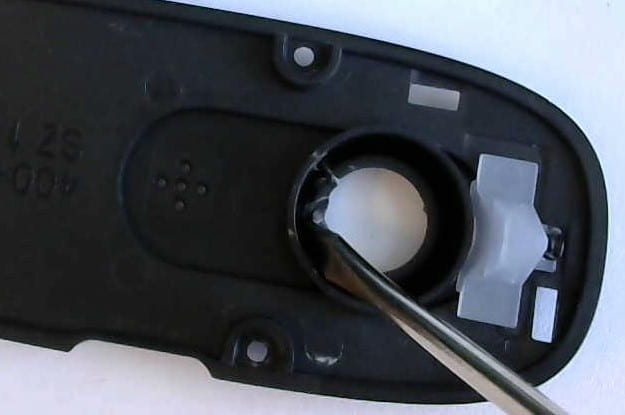
Figure 8. Score the lens opening on one side to make the ends of the slot. Score or cut the lens opening on one side to make the ends of the slot. I found the best positions were 45 degrees above and below horizontal, toward the microphone, as shown in Figure 8. This leaves enough room to get the paper clip in and move the gear wheel by at least one tooth and slot. Making several cuts in between +/- 45 degrees makes it very easy to remove the slot material.
- Remove Slot Material:

Figure 9. View from the rear showing the tab between the cuts. Pry out that tab. Pry out the material between the two cuts to make the slot. You can push it with a screwdriver, or work it back and forth with pliers until it breaks off. If you’ve made several cuts the tabs should come off easily and relatively cleanly, because there is a natural thinning at the base of the tab you’ve created. You may want to clean up the break a bit with the knife, but it’s not required (nobody but you will notice).
- Reassemble:
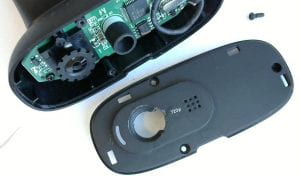
Figure 10. Front view showing the tab removed to make the slot. Put the microphone sleeve back in place (remember that?) and then put the face plate back in place. Secure it with the three screws, and then put the frame back over the front.

References
I first found out about removing the glob of glue from the YouTube video Logitech c270 focus adjustment . I have not yet seen any other suggestions to make a slot for a paperclip, but I would not be surprised if someone else has had the same idea.

This is the best part of the internet. Stuck on a problem, and sure enough, some dude out there has solved it an made a post about it. Thanks for making the internet a better place.
Wow, what a trick. This got me out of a hole with having to take close ups of documents via webcam for an online account.
This was super helpful thanks! I had all the tools, and the only difficulty I had was getting the hot glue off but I got it eventually.
If you have a 3d printer you can convert it to have an outer focus ring. https://www.thingiverse.com/thing:2446030
Jack, that is great! Thanks for sharing that.
-Eric
Thank you for sharing a very nice blog.
Thanks, I have done this. I can now take pictures of documents close up and then return to face focus using a pin or whatever on the gear wheel. I think this will extend the life of this camera for a while longer.