
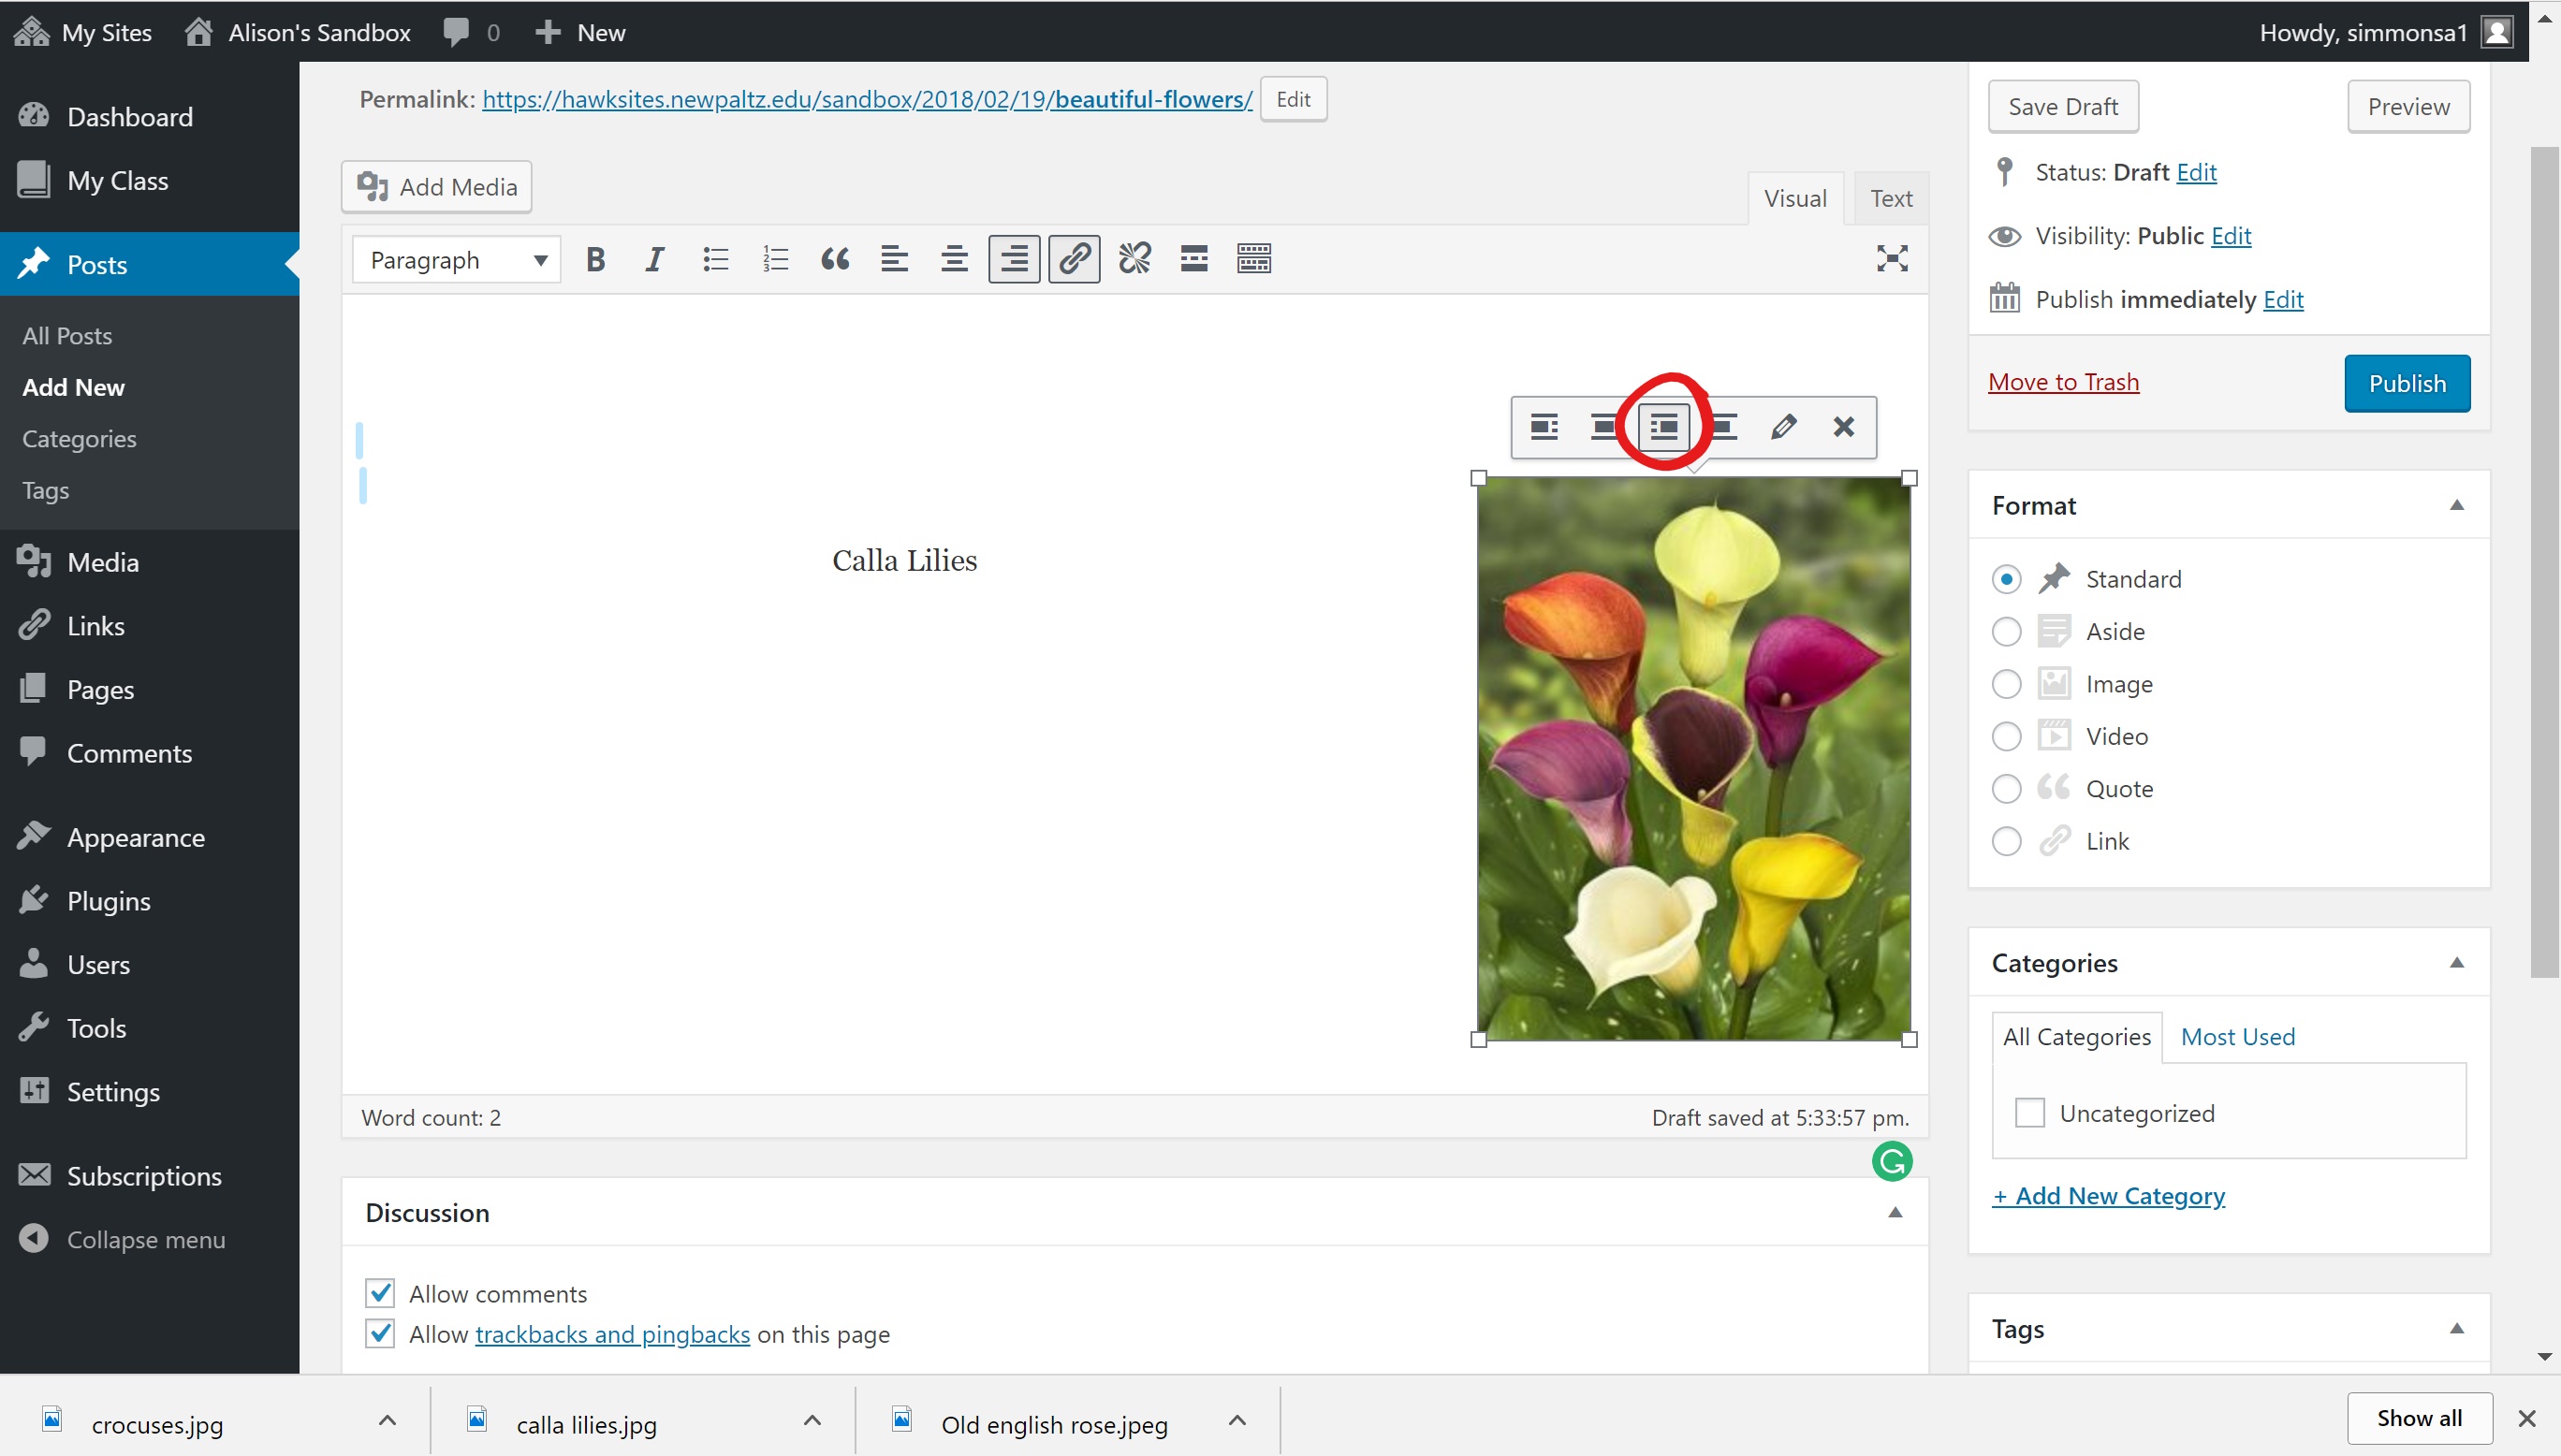
- Once you’ve inserted an image into your post/page you can decide how you want it to sit within it. Click on the picture to have a few editing options will appear.

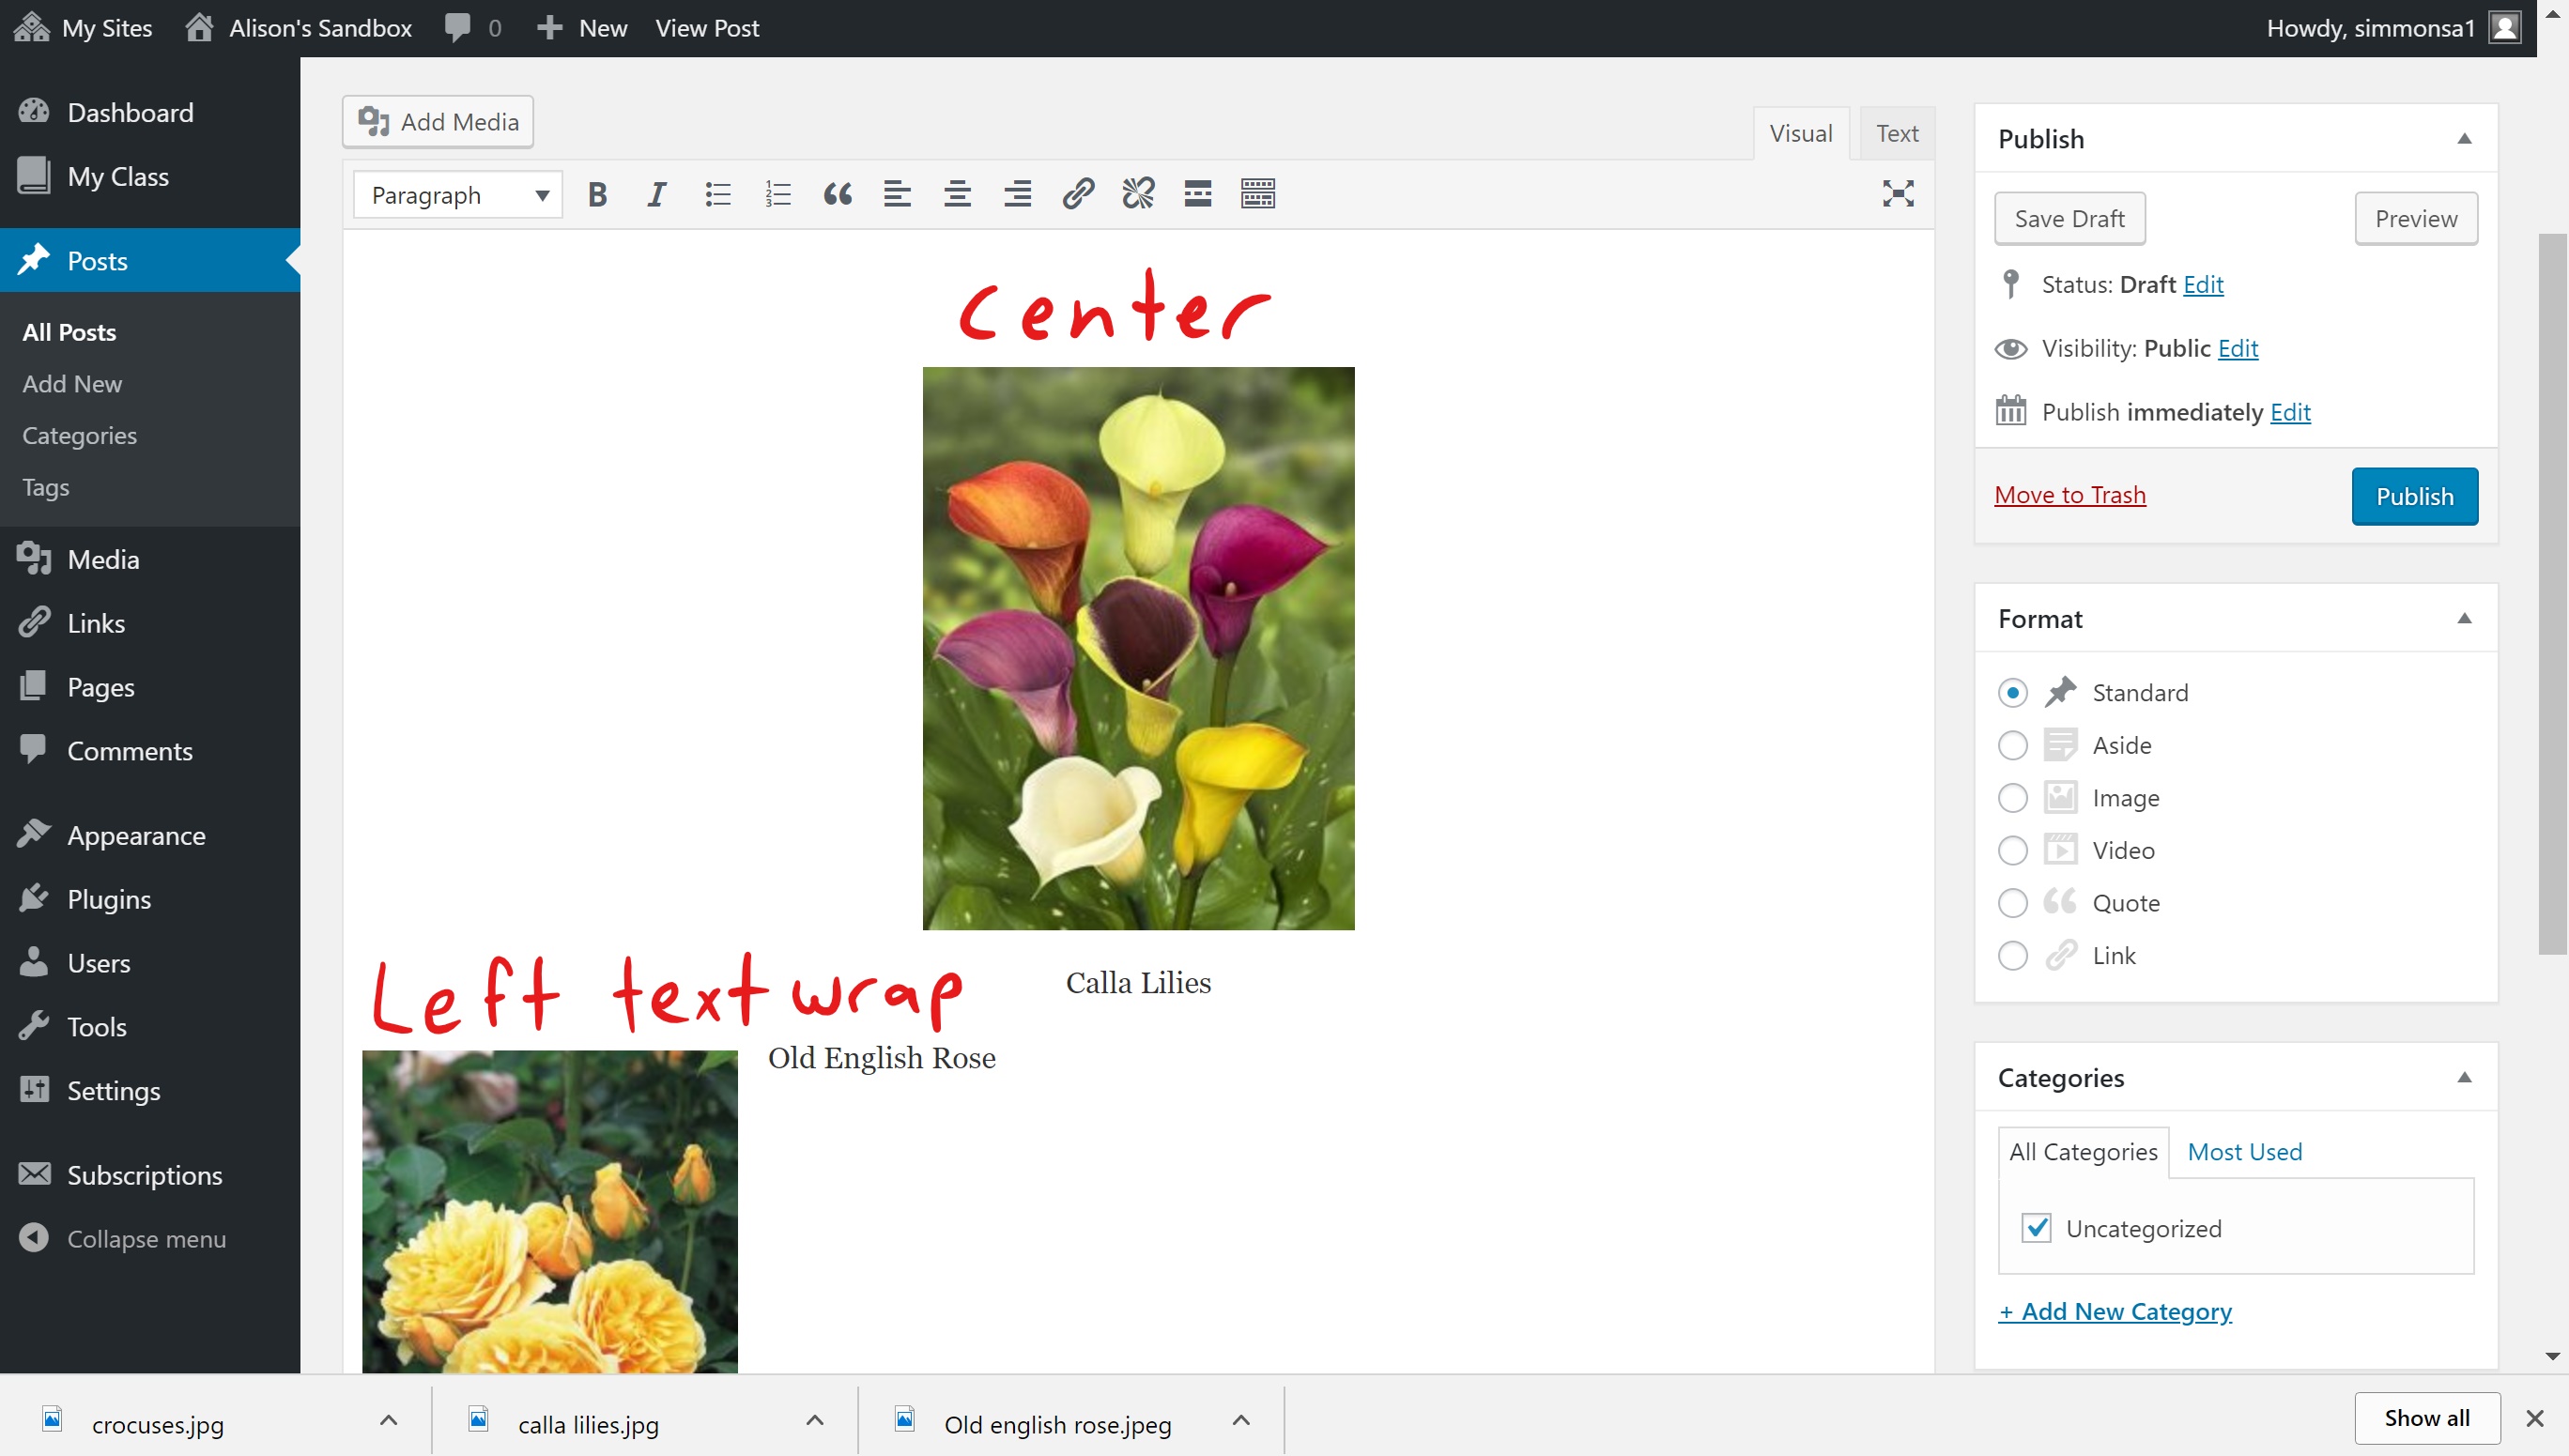
- These four alignment options allow you to move your photo left, center or right independently from the alignment of the text. The first and third option allows the text to wrap around the photos.


- You can have multiple photos with different alignments within the same post. As seen by these here.

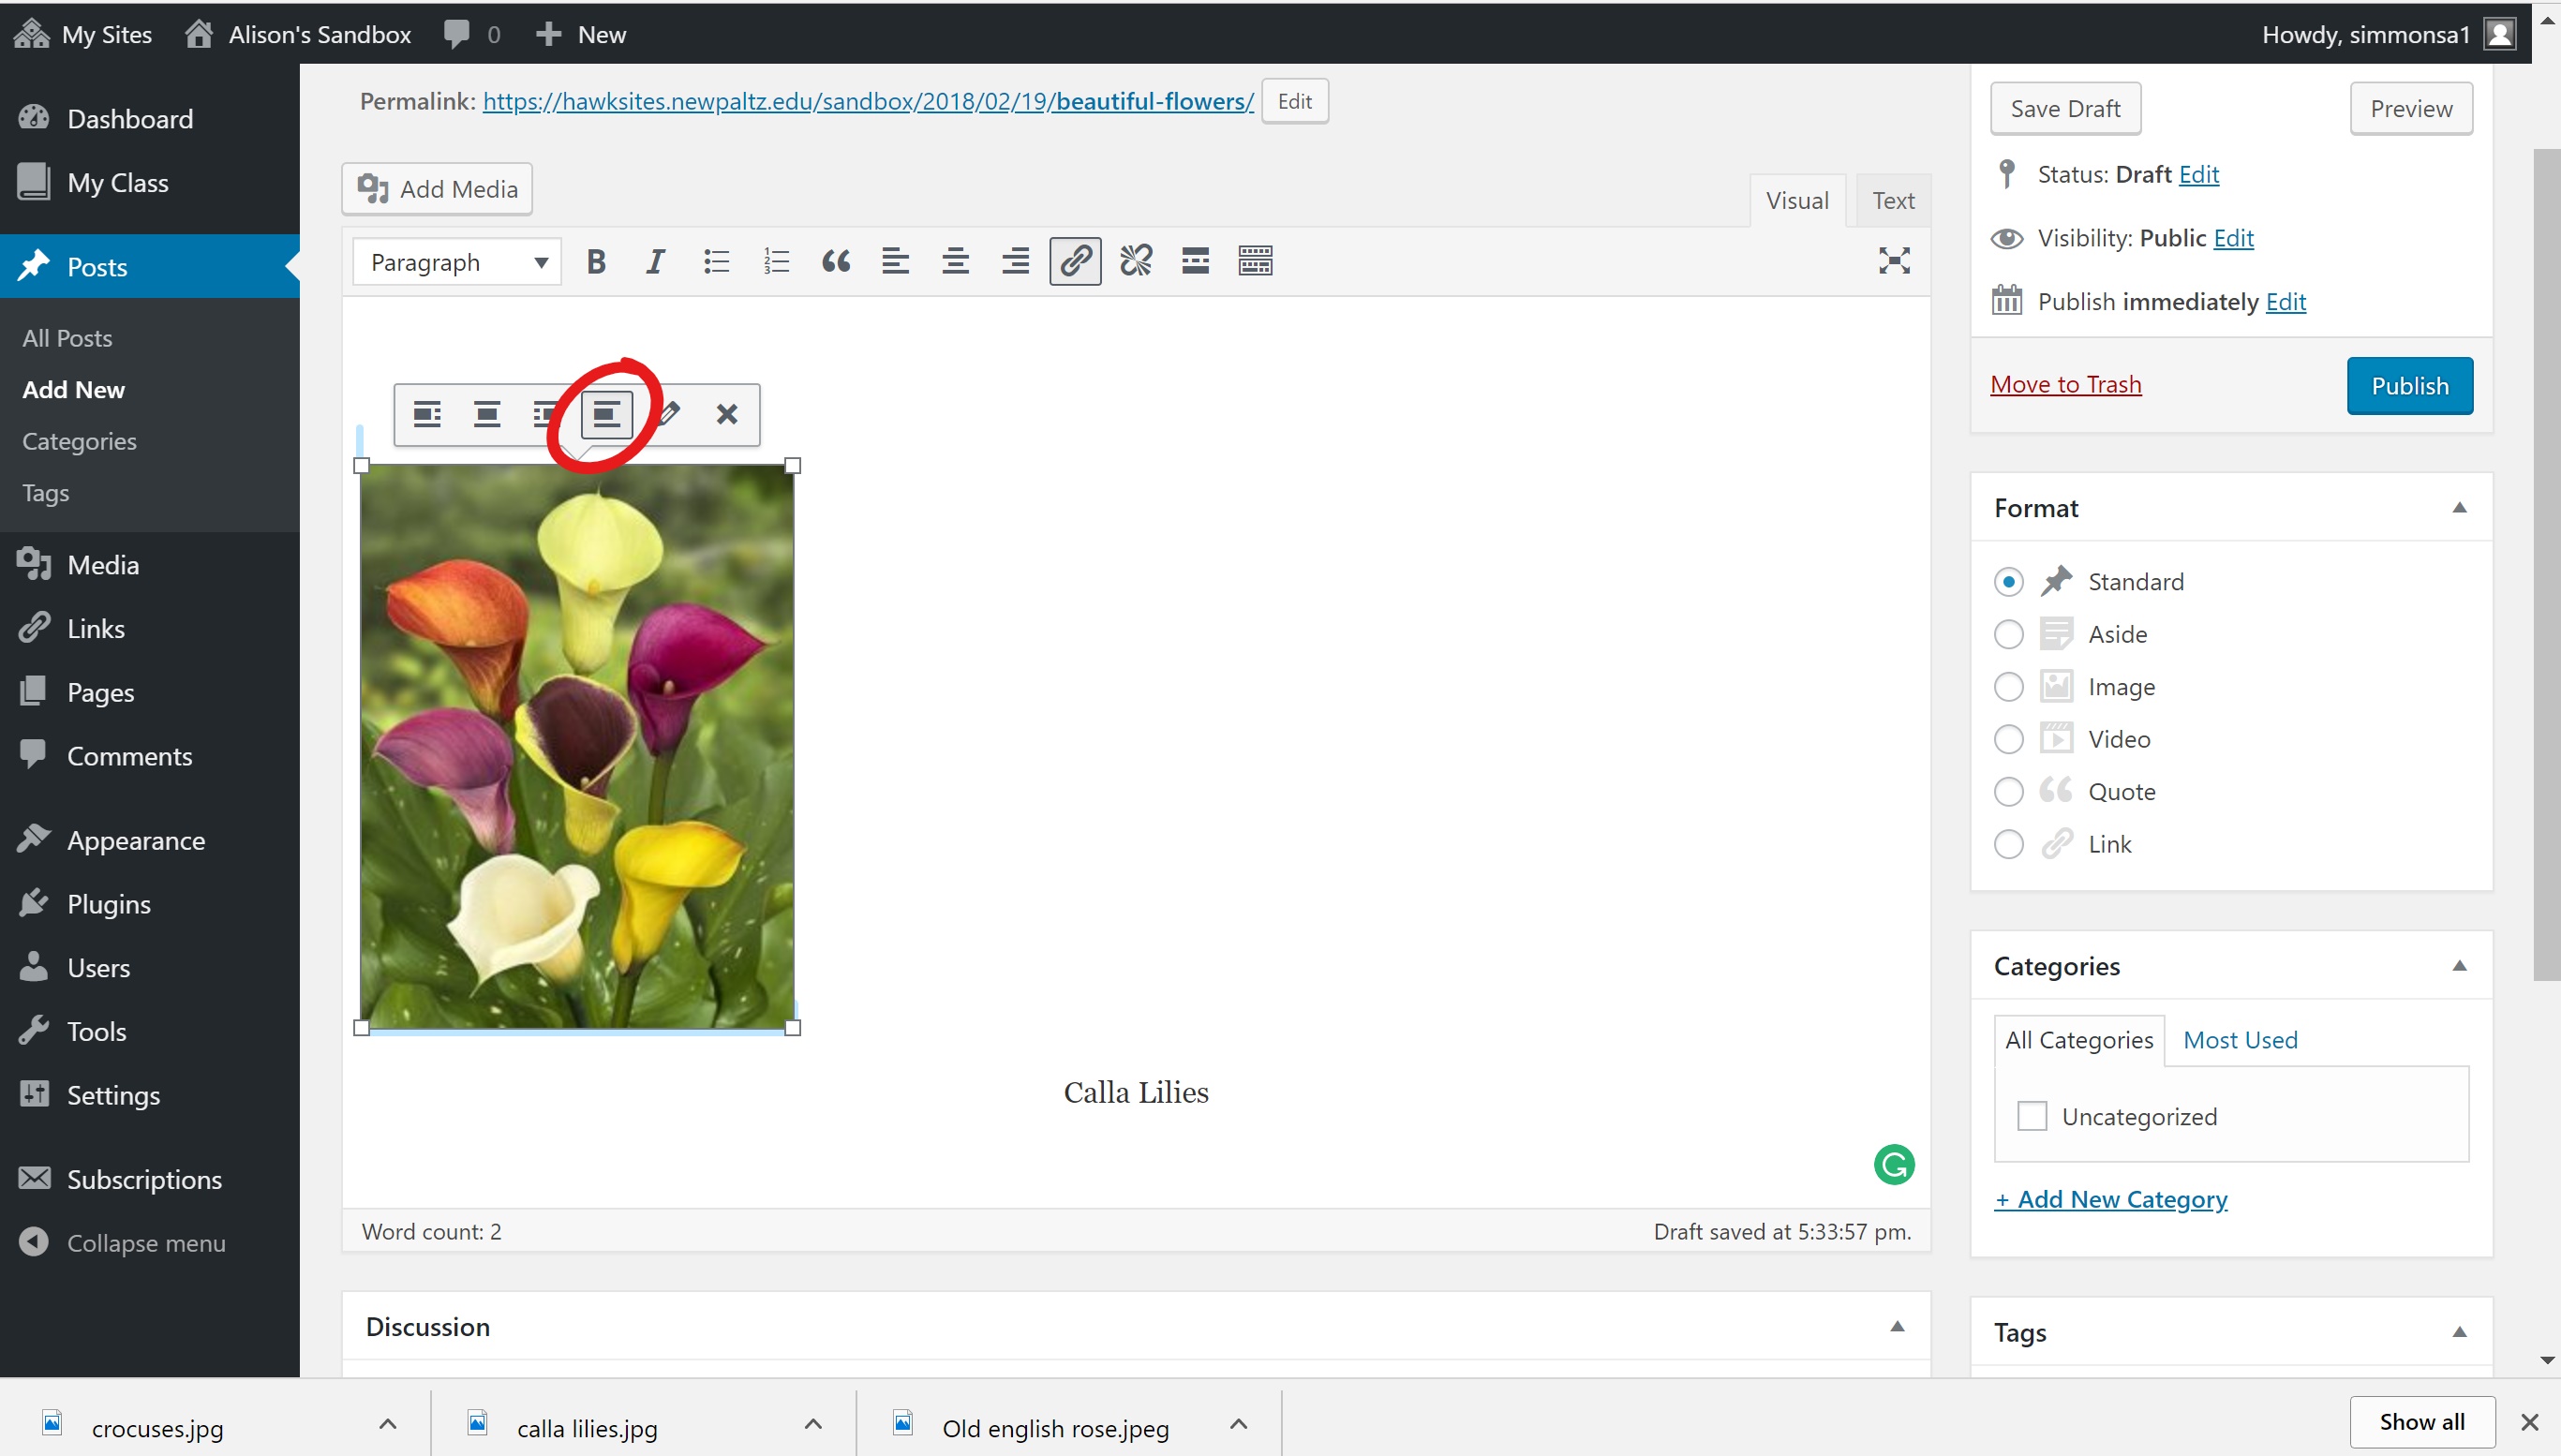
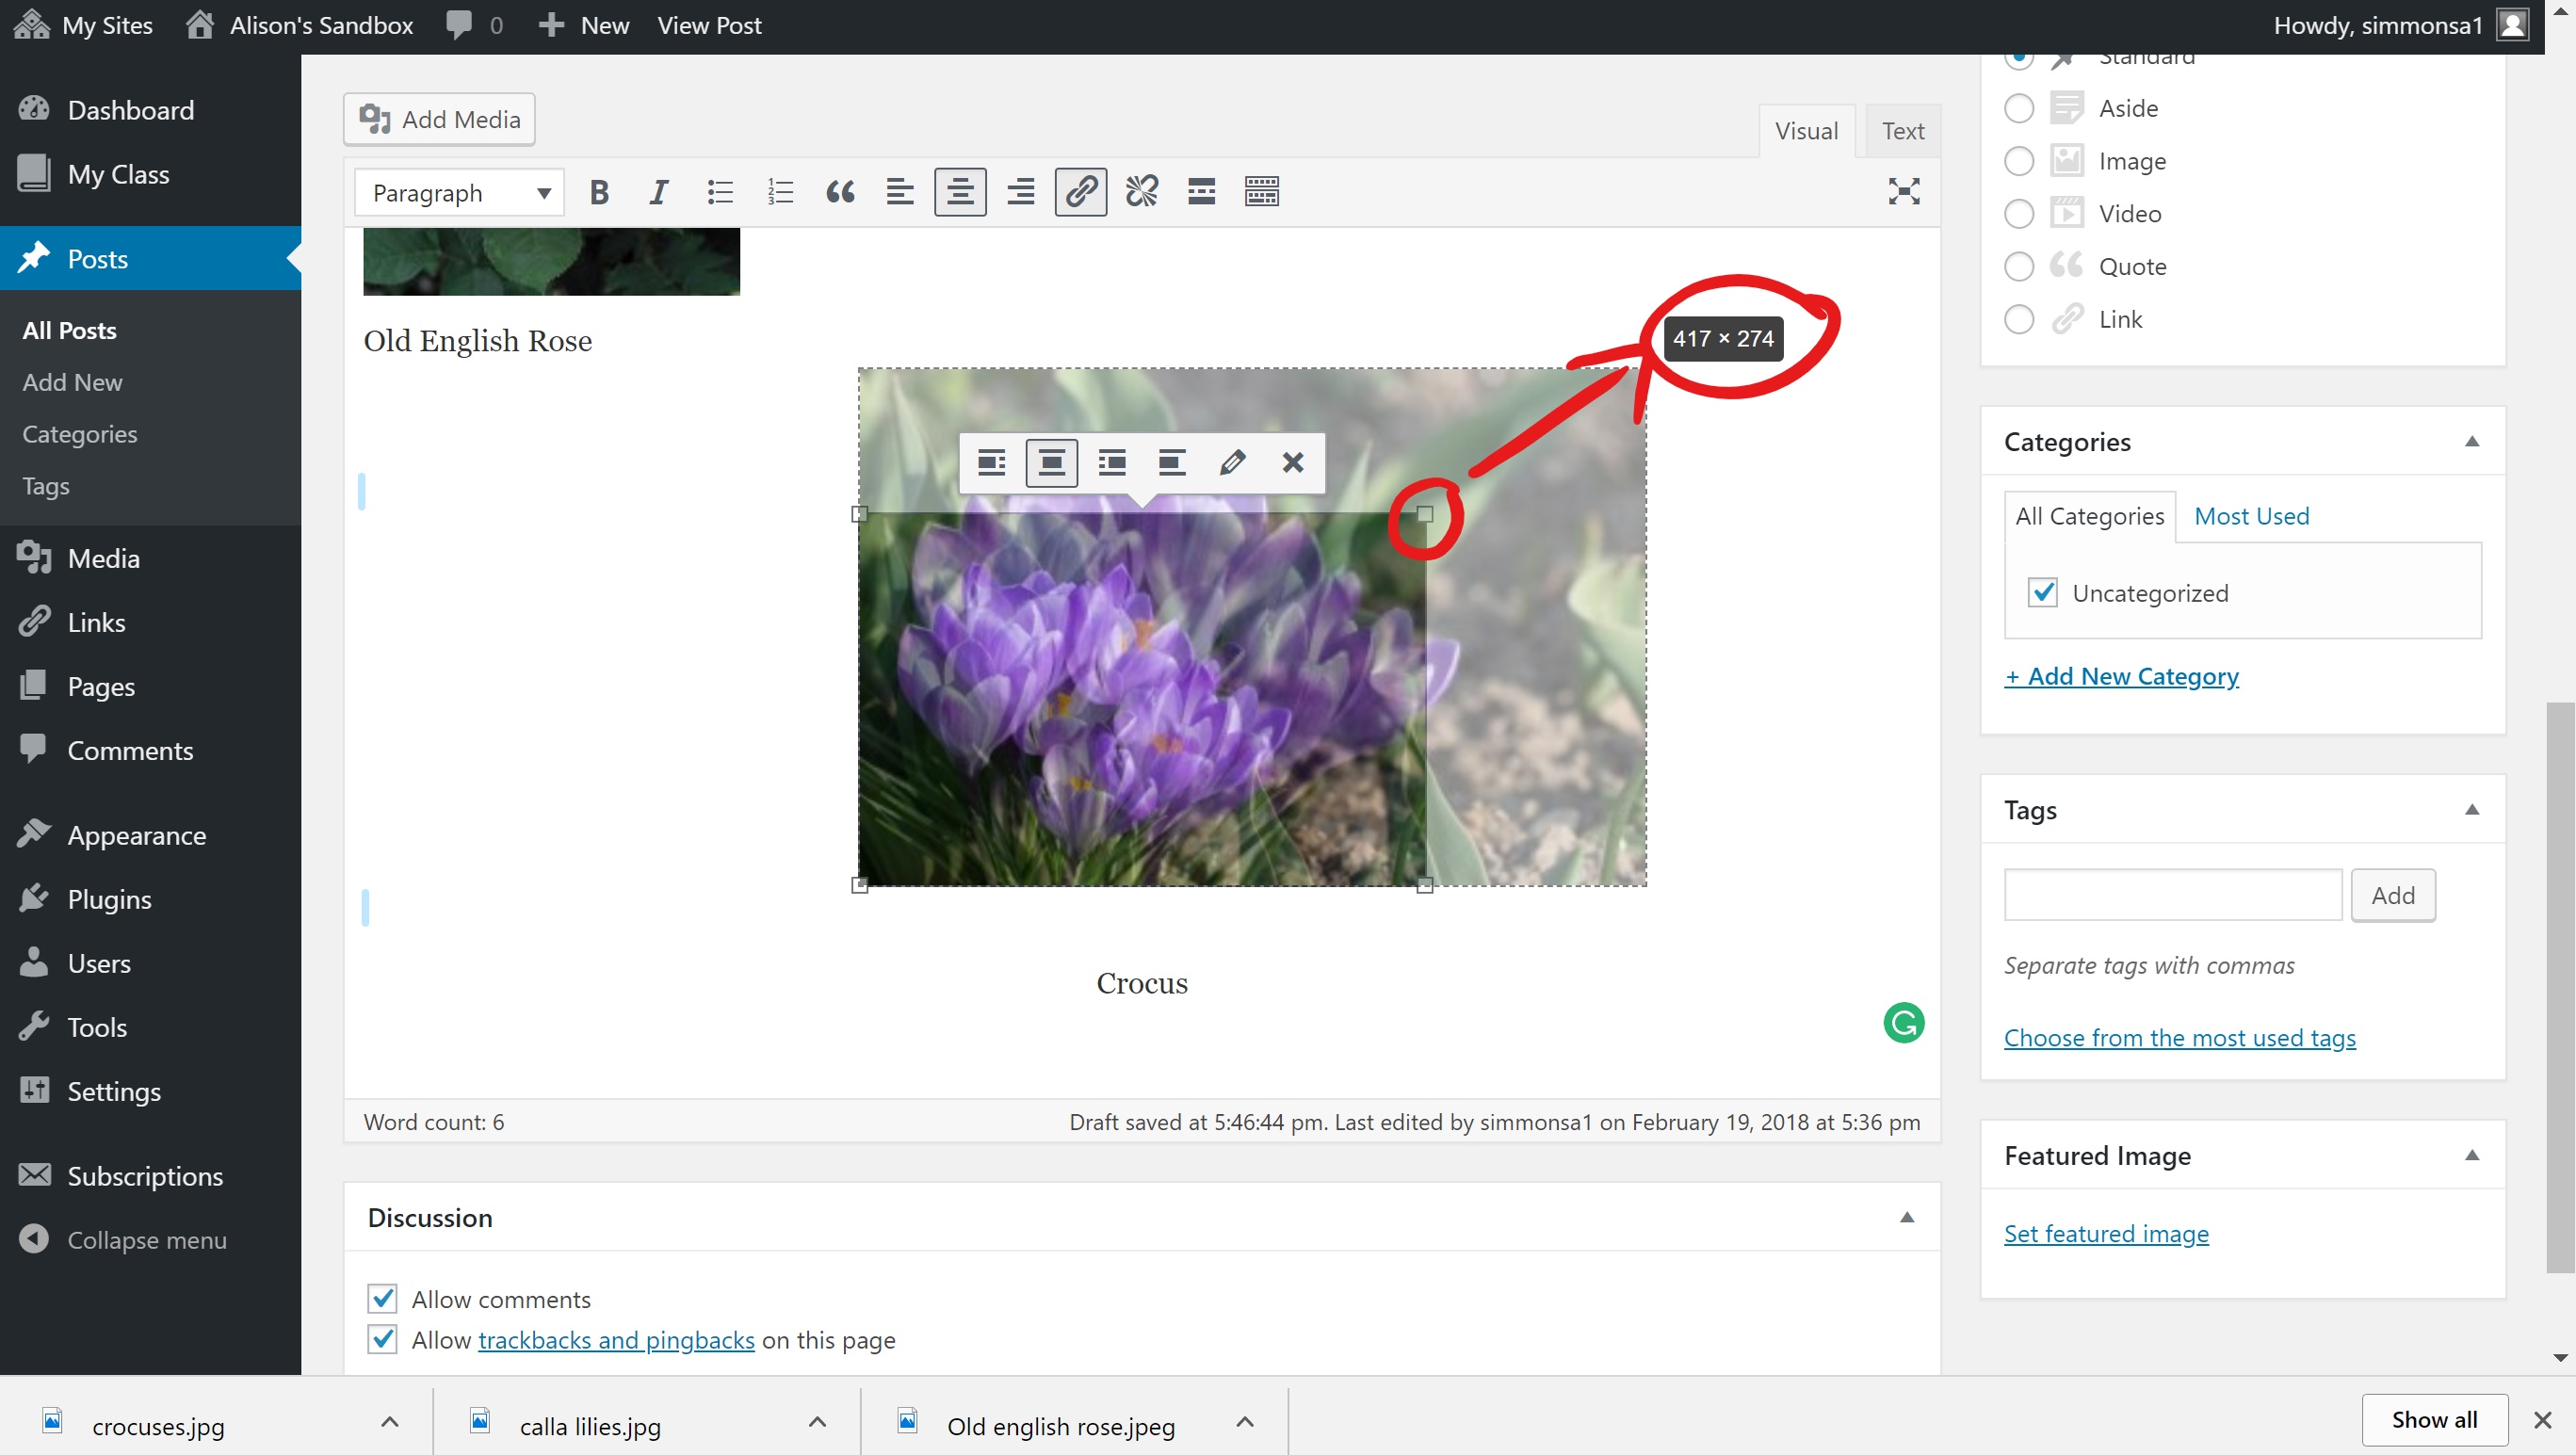
- Now let’s talk about resizing your photo. When you click on the picture these small markers will appear on each corner of the photo. Click and drag to change the size of your image manually. It will state how big or small the new image is. If you change the size dramatically from it’s original it will become blurry.

- This is what it’ll look like when you’re done.


Comments are Closed


You must be logged in to post a comment.