
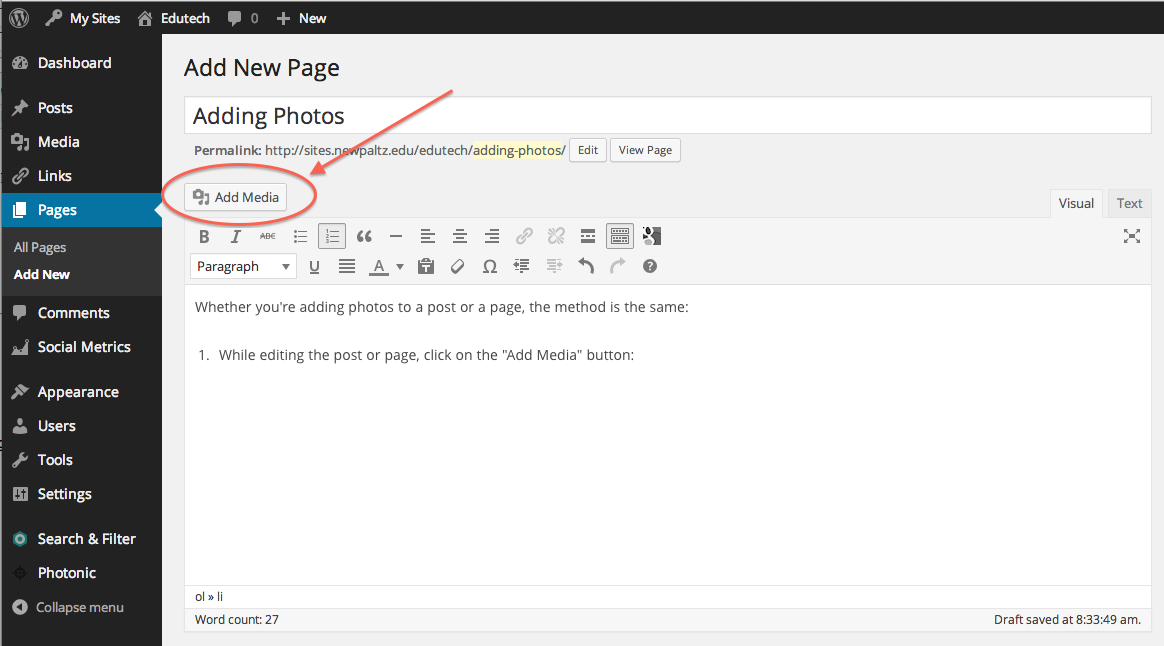
Whether you’re adding photos to a post or a page, the method is the same:
You can also watch how to do this here.
- While editing the post or page, click on the “Add Media” button:
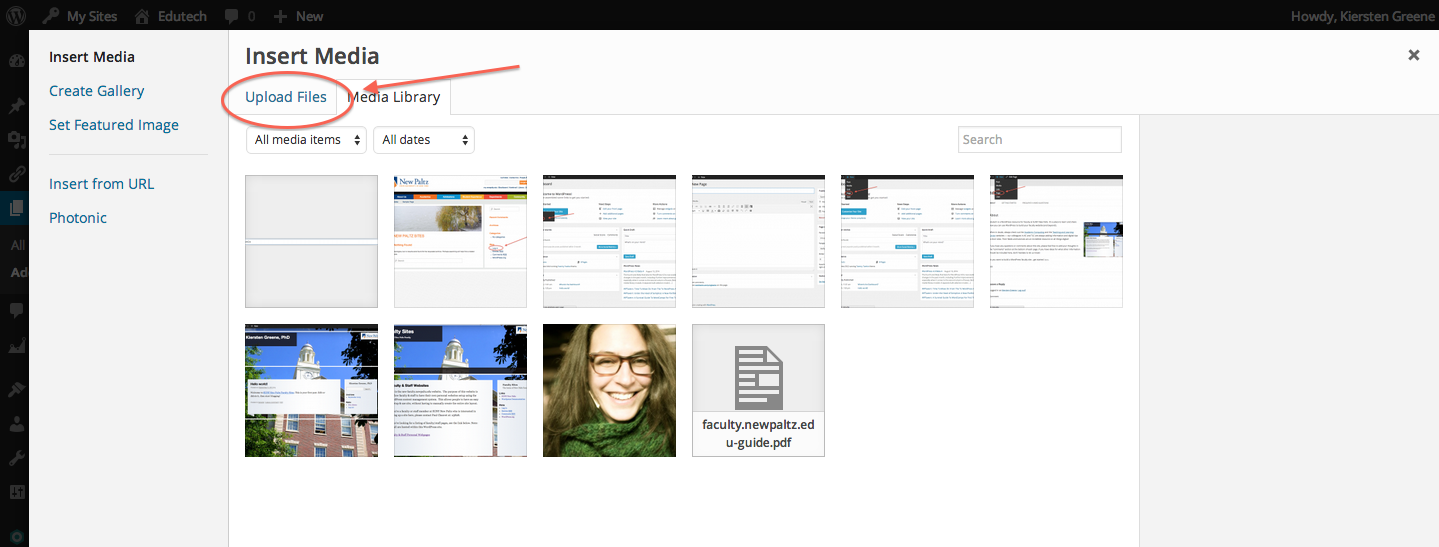
- Choose “Upload Files”:
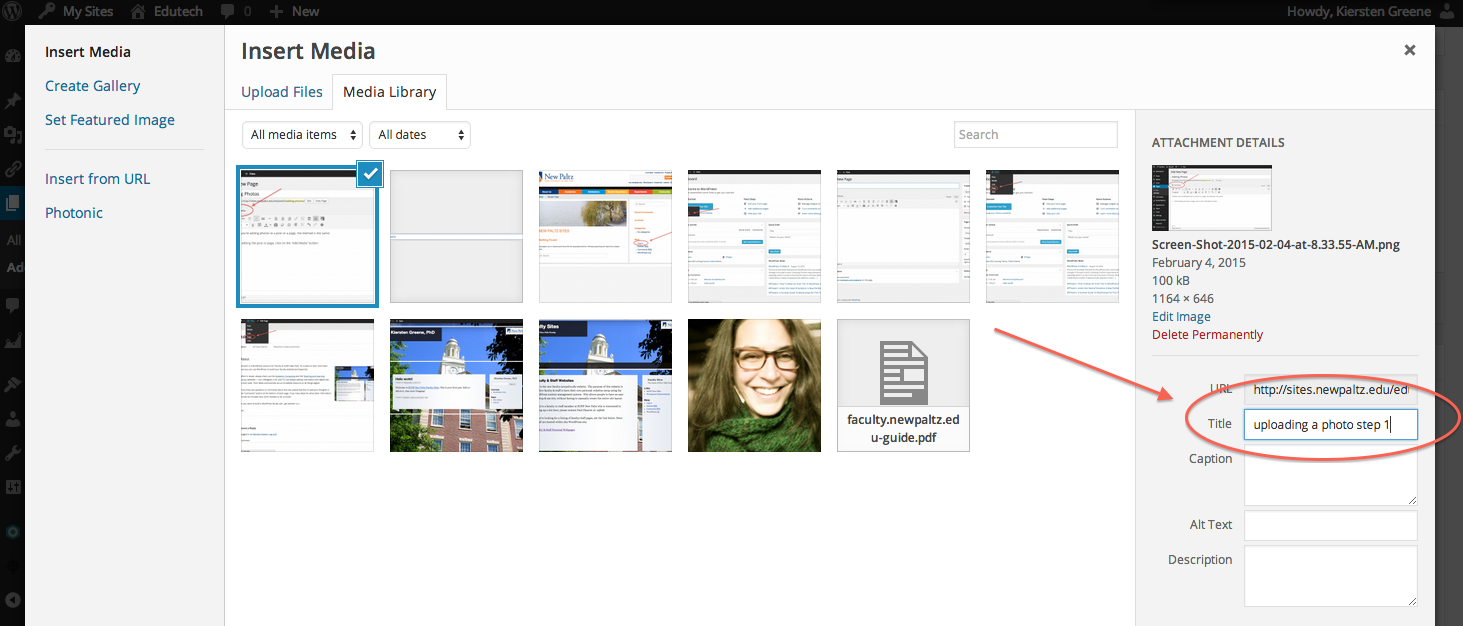
- Once the file has uploaded, select the picture you’d like to insert in the post by making sure the box is checked as indicated:

- Change the title if you’d like:
- Choose the alignment you’d prefer (left, center, right):
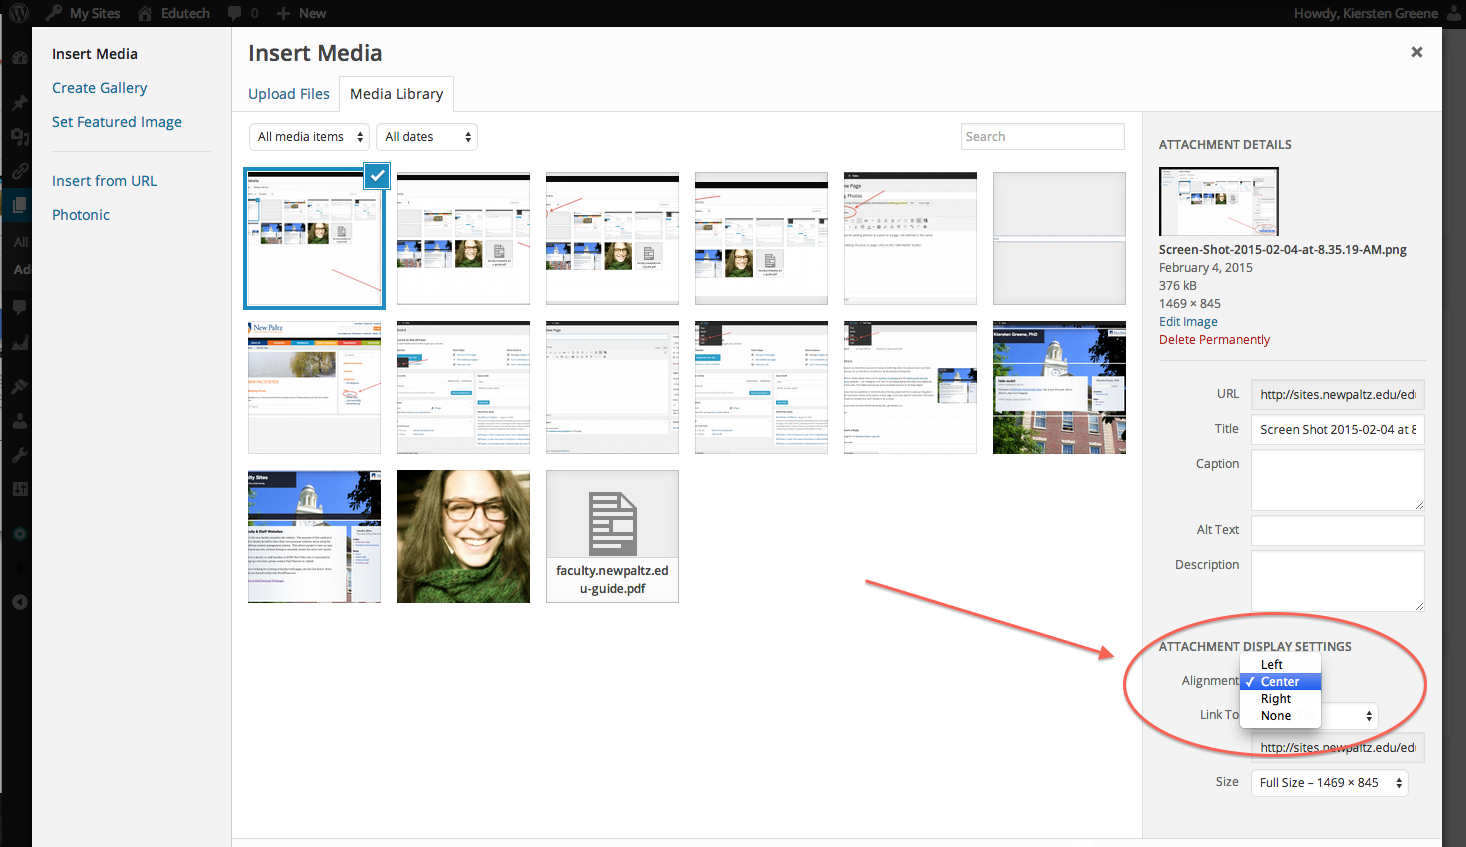
- Indicate the size of the photo (you might want to play around with this a little to see what happens when you choose different options):

- Click “Insert into page”:

- You’ll be brought back to the editing page and can click “Preview” at the top right-hand corner of your screen to see how your new photo will look once you publish the page or post.


You must be logged in to post a comment.